Introduction to Sticky Bit
The sticky bit is a permission setting in Linux/UNIX systems applied primarily to directories. When enabled, it restricts file deletion or renaming to only owner and the root user, providing enhanced security for shared directories like /tmp.
Why it is so important ?
Imagine a shared directory like /tmp, where multiple users create temporary files. Without the Sticky Bit, any user with write permission could delete or rename files created by others, leading to potential data loss and system instability.
Sticky bit with Examples
The example below enables the sticky bit on a directory. Use chmod command to set the sticky bit. If you are using the octal numbers in chmod, give 1 before you specify other numbered privileges, as shown below. The example below gives rwx permission to a user, group, and others (and also adds the sticky bit to the directory).
$ chmod 1777 /tmp
You can also use the command below instead.
$ chmod +t /tmp
$ ls -ld /tmp
drwxrwxrwt 10 root root 4096 Oct 25 10:15 /tmp
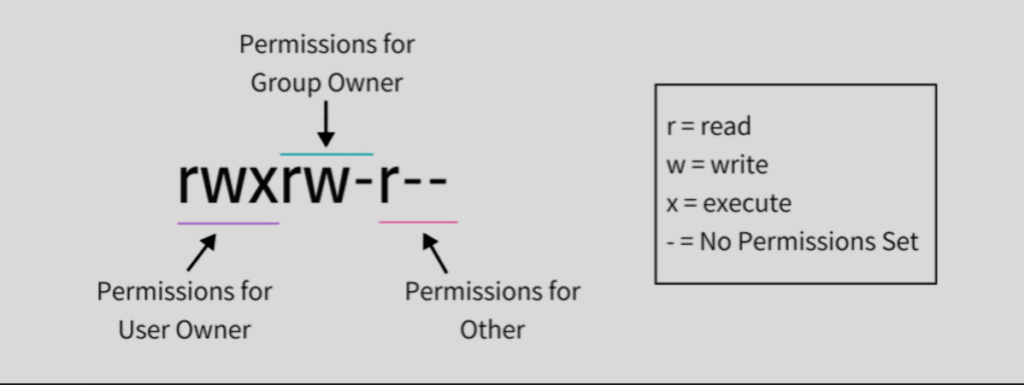
Once the sticky bit is assigned to a directory, you’ll see (t) as the last character in the permission as shown above. In this example, it is drwxrwxrwt. In this example, setting the sticky bit on /tmp means users can write their own files, but only the owners or root can delete or modify those files.
$ su guest
Password:
$ cd /home/justgeek/dir1
$ rm justgeek.txt
rm: cannot remove `justgeek.txt': Operation not permitted
Removing sticky bit
If you want to remove the sticky bit, you can use -t as shown below
$ chmod -t /path/to/dir
Hopefully today you know, How to Use Sticky Bit on Directory and File. If you want to learn more about Linux basics, then you can check here
